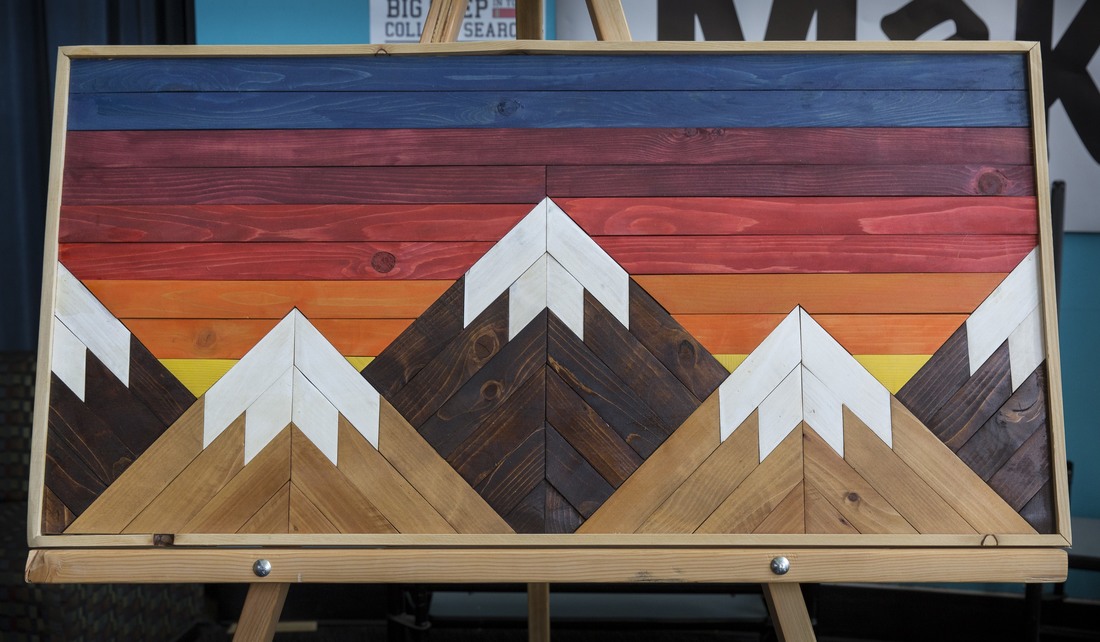
The Mountain Project
Steps
1. We made blue prints sketching out our design and measurements.
2. We got all our pieces we were going to need and started to cut them, starting with the smallest pieces at the bottom, with the miter saw.
3. Once we had all our pieces cut to their correct size and they all fit together we sanded them.
4. Then we stained them all whatever colors we wanted to.
5. Then we glued them all down and added the frame.
6. We sold them!
Reflection
The hardest part of it all for me was probably using the miter saw to cut the pieces. The pieces had to be the right size so it all fit together and we had to redo a lot of them. I learned to use the miter saw during this project which was cool because I never really thought it would be something I'd do. The final product I think turned out really well and I really like the way we did the sunset above the mountains. I'm also really happy is sold pretty quickly.
